
ONTRAmail
About ONTRAmail
Applies to: All ONTRAPORT accounts.
ONTRAmail lets you create beautiful, responsive email templates either from scratch or using an impressive library of professionally designed templates. Fully mobile responsive and adhering to the requirements of hundreds of different email clients, ONTRAmail offers unparalleled design flexibility with thousands of options for creating unique email messages for any purpose that look amazing on any device.
To jump right in and create ONTRAmail message in your ONTRAPORT account? Click the question mark icon at the lower right in your account and select the Quick Start Checklist option. Click to open the "Create an Email" guide.

The Messages Collection
Where to Find the Messages Collection
The Messages Collection stores all of your saved Email, ONTRAmail and Task messages. It is accessed through the Campaigns > Messages main menu item (in some accounts the Messages Collection will be found in Contacts > Messages instead).

Customize the Display of the Messages Collection
Resize Columns
Hover just to the left of the column heading, then click and drag the < > symbol to resize the column.

Default Columns
- Name - The name you give the message. This is not seen by your contacts.
- Subject - The subject line of the message.
- Spam Score - A score added by SpamAssassin; scores of 5 and above are not sent. Scores of 3 or below are considered excellent.
- Date Created
- Type - ONTRAmail, Email, and Task are the basic Types you will see here. If the Type is "ONTRAmail (Transactional)" or "Email (Transactional)" then the email has been selected as Transactional Only.
- Sent - The number of messages sent.
- Opened - The number and percentage of sent messages that we could detect were opened by the recipient. See note.
Note: We use a single pixel transparent image that is loaded from our servers to detect if the email is opened. If the recipient has images turned off, or uses a privacy plugin they will not be counted as an "Open". Links are tracked 100%, so a click on a link is always counted. You may see "clicks" outnumber "opens" for some messages.
Add New Column Headings
Customize the fields that are displayed by clicking the + Add Column button in the upper right-hand corner. In addition to the default "Opened" column that is displayed, you can add additional columns to see at a glance how each message is performing:

Popular columns to add:
- Clicked - How many recipients clicked at least one link in the email.
- Not Opened - How many we could not detect were opened. See note
- Not Clicked - How many recipients did not click any links in the email.
- Opt Outs - How many recipients clicked the "Manage Your Subscription" link and opted out.
- Complaints - How many recipients complained that your message was spam.
Note: We use a single pixel transparent image that is loaded from our servers to detect if the email is opened. If the recipient has images turned off, or uses a privacy plugin they will not be counted as an "Open". Links are tracked 100%, so a click on a link is always counted. You may see "clicks" outnumber "opens" for some messages.
Sorting the Contacts display
Sort your Messages by clicking on the column headings. Click the heading again to reverse the sort order. Any of the columns you add can be sorted in this way.
Set the number of Messages per page
Change the number of messages that display on a page at the bottom of the page. This setting will remain in place until changed again. Also note the status bar indicates the page that you are currently viewing.

Create a Group of Messages
Click the Group drop down list to create a new Group, or load and manage any existing Groups.

You can set criteria to filter messages in dozens of ways, and save the Group for viewing later. Each time you display the Group the system rechecks and adds all messages that meet the criteria automatically. Examples include messages created within the last 30 days, all messages with names starting with the letters "MRKTG:", or to only show one of more of the message Types.
Search
To search for a value in your Messages Collection that is displayed in one of the column headings click in the search bar, enter your query, and press the Enter key.
Get Started with ONTRAmail
After you load an ONTRAmail template, the edit screen is divided into two sections. On the left is the palette, where most editing actually occurs. On the right is the canvas where changes appear in true "what you see is what you get" visual mode.

Here's how to get started:
- Mouse over the Campaigns collection and click on Messages. Click New Message.
- Click Create New in the ONTRAmail icon.
- Select an email template for editing, or select Start From Scratch for a blank template.

- Hover over a block to reveal the editing controls. You can scroll through different block layouts, add a block above or below, style the block and edit the block.

- The three icons in the top right when you hover over a Block allow you to edit the style of the Block (pencil icon), create a copy of the Block on the same page (plus sign) or remove the Block from the page (trash can icon).

Adding and Using Blocks
- Templates are created using <em>Blocks</em>, horizontal slices of the page you can rearrange or replace to perfect your design. Changes are made in the ONTRAmail editor in true visual mode, showing you the new content immediately.
- Hover over the Block and click the + Add Block icon to add a new Block above or below. The Palette will list the Block categories.

- Select a Block Category in the Palette to narrow the choices by type of Block. Select the design. You will be returned to the Blocks on This Email view.
Style: Colors and Fonts
ONTRAmail uses the colors, fonts and page styling of material design, tested and proven to increase engagement and present content in the most readable and responsive manner.
The overall email design can be modified by selecting the element on the top styling bar on the Canvas (it is visible when the Palette is in the "Blocks on This Email" view):

No customization is necessary to create pleasing layouts, and we encourage you to try the pre-formatted font packs and color palettes without extensive modification to maintain the material design standards. This will give you time to fine tune your content and focus on growing your business. But for those who need to modify fonts and colors, we have extensive customization options:
Font Style
A selection of 39 Font Styles provide a set of fonts for 8 different text elements in your ONTRAmail: Header 1, Header 2, Header 3, Label, Button, Large Body Text, Body Text, and Quote. You can edit each one for font family, font size, font face, line height and font weight, and can toggle it to italics as well. The changes you make to a font here cascade throughout the email. The font styles can be set differently for the desktop and mobile view (mobile view shown).

Click Font Suggestions at the bottom to display all 39 Page Font sets in the Palette. As you hover over the suggested font sets in the Palette the display in the Canvas shows the fonts.
Colors
39 color palettes use five related color elements, Primary, Complementary, Dark, Light, and White. Click the color icon to display the selected colors. Click on the color element name to reveal the color editing functions. Type in the color hex value or choose a color from the color picker. The color picker has two modes, the default 256 web-safe color tile mode and, by clicking the artist's palette icon at the bottom, an infinite slider color picker.

Click the Color Suggestions link to see all 39 color palettes in the Palette on the left. As your mouse hovers over a color palette the Canvas previews the new colors.
Changes you make to the page style apply only to the current email, and do not get saved with the color palette for use in other email. To re-use your color and font choices use the Copy from email function when creating a new email or the Renaming and Saving Blocks function for individual Blocks.
Edit Content in Blocks
The palette will show the Blocks on This Email view.

Click and drag on the block names in the palette to rearrange them.
The Visibility Toggle appears when you hover over an element to allow you to hide or show that element. It turns from green to red when it is hidden.

To edit a block, click the block name in the palette or hover over the block on the canvas and select the Edit link.
The palette will display the block's individual elements for editing. Click on the element name in the palette to edit it. Editing options after clicking are dependent on the type of content you are editing.
Edit Text and Insert Merge Fields
Edit most text directly in the block.
ONTRAPORT merge fields are available by clicking the Merge Fields button. Merge fields can be inserted into your email messages to personalize them. Nearly every field in the Contact Record is available as a merge field, including the contact's name, address, the last invoice amount, etc. All ONTRApages and legacy Landing Pages are listed to be included as personalized URLS, or PURLS. Additionally, coupon codes, membership username and password, staff/user fields, unsubscribe links and website membership details can be found in this dropdown menu. See this article for more details.
See our article on Formatting Merge Fields for information on formatting options and the default value you can display if the Contact Record field is empty.
Note: Do not copy merge fields from another email template or document type such as Word or Google Docs. Use the drop down Merge Field selector <em>only</em> to insert merge fields. If you do copy from another document or email delete the merge fields and replace them using the drop down selector. "Hidden" HTML or editor formatting codes will break the merge field and cause it to be sent as "plain text" in your email.

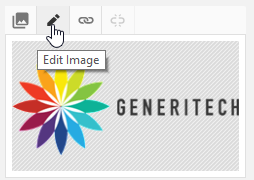
Insert Images
Wherever an image exists in a block, change an image clicking on it and select the change image button. Upload your own or select one from your image library.

To open the Photo Editor for the current image, hover over the image in the palette and click the paint brush icon. Use the Photo Editor's tools to fine tune your image, then click Save.
You can determine the image's original size by clicking the Transform icon in the editor and noting the dimensions at the bottom of the edit panel.

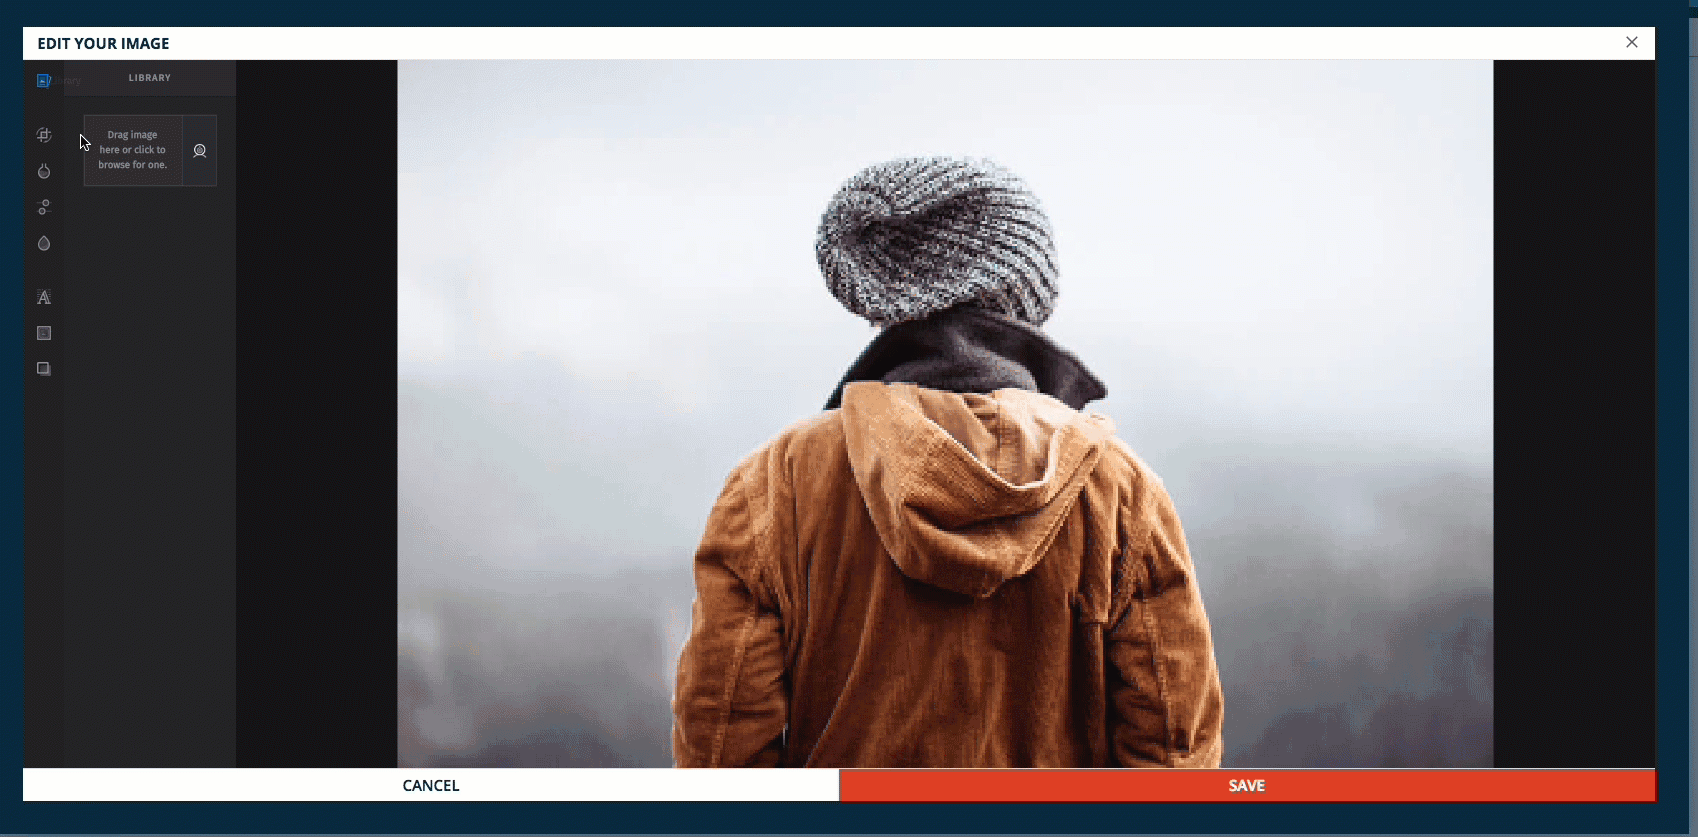
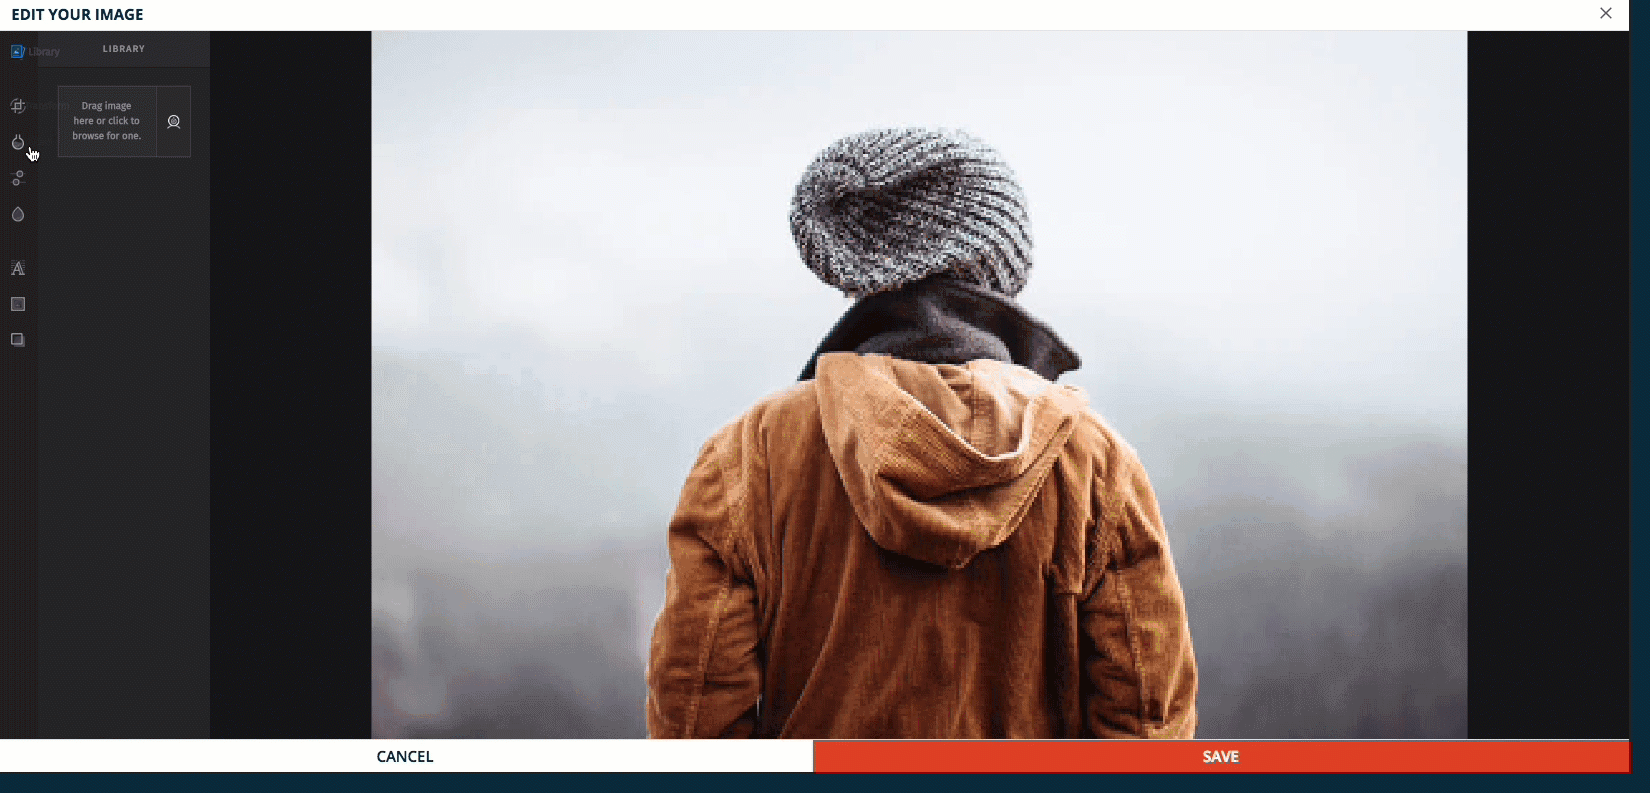
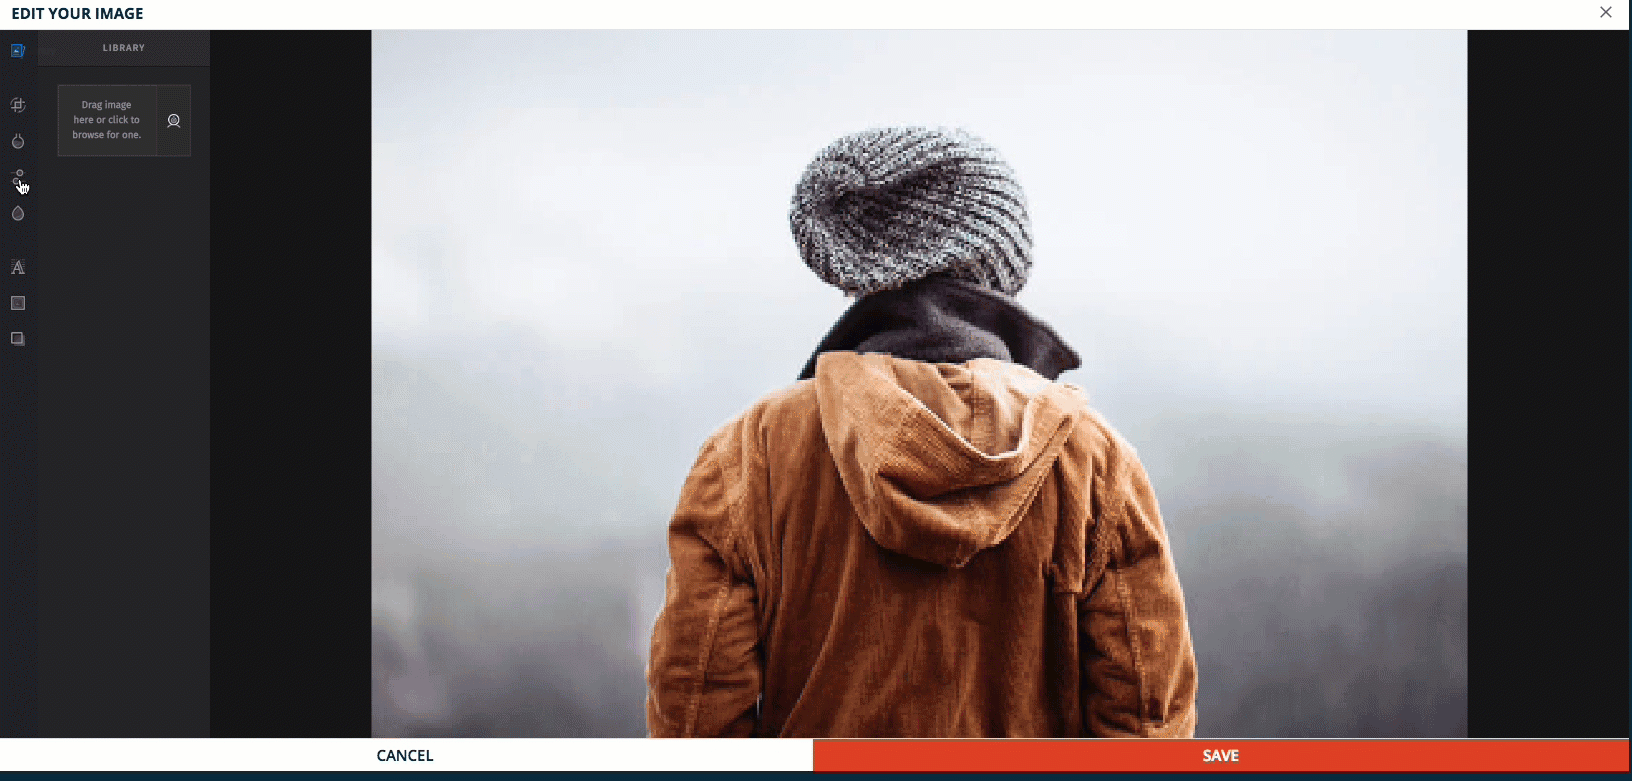
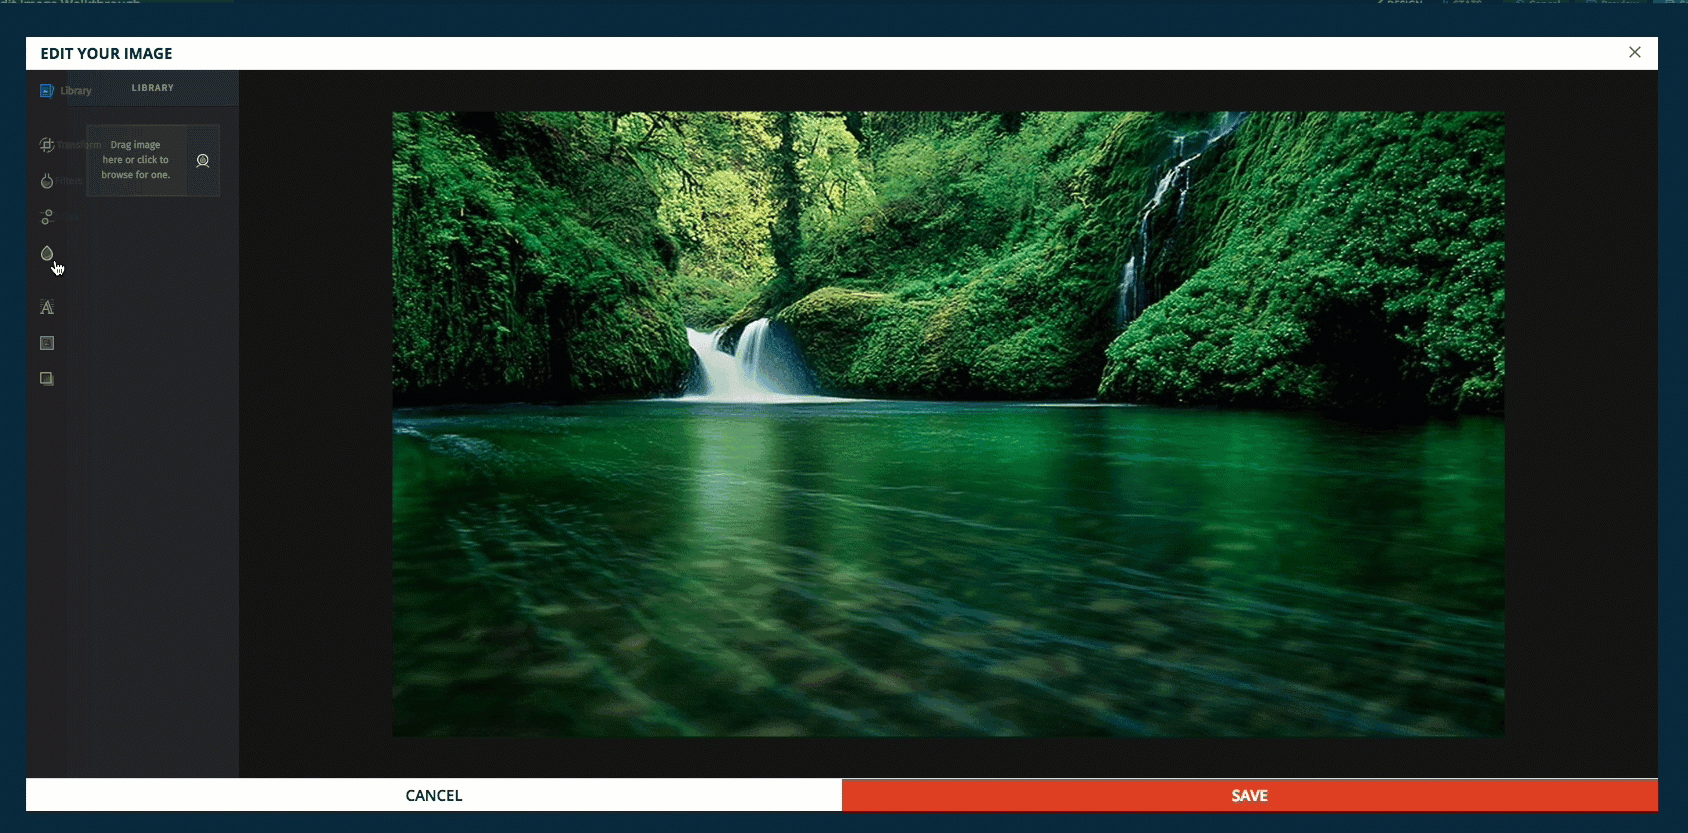
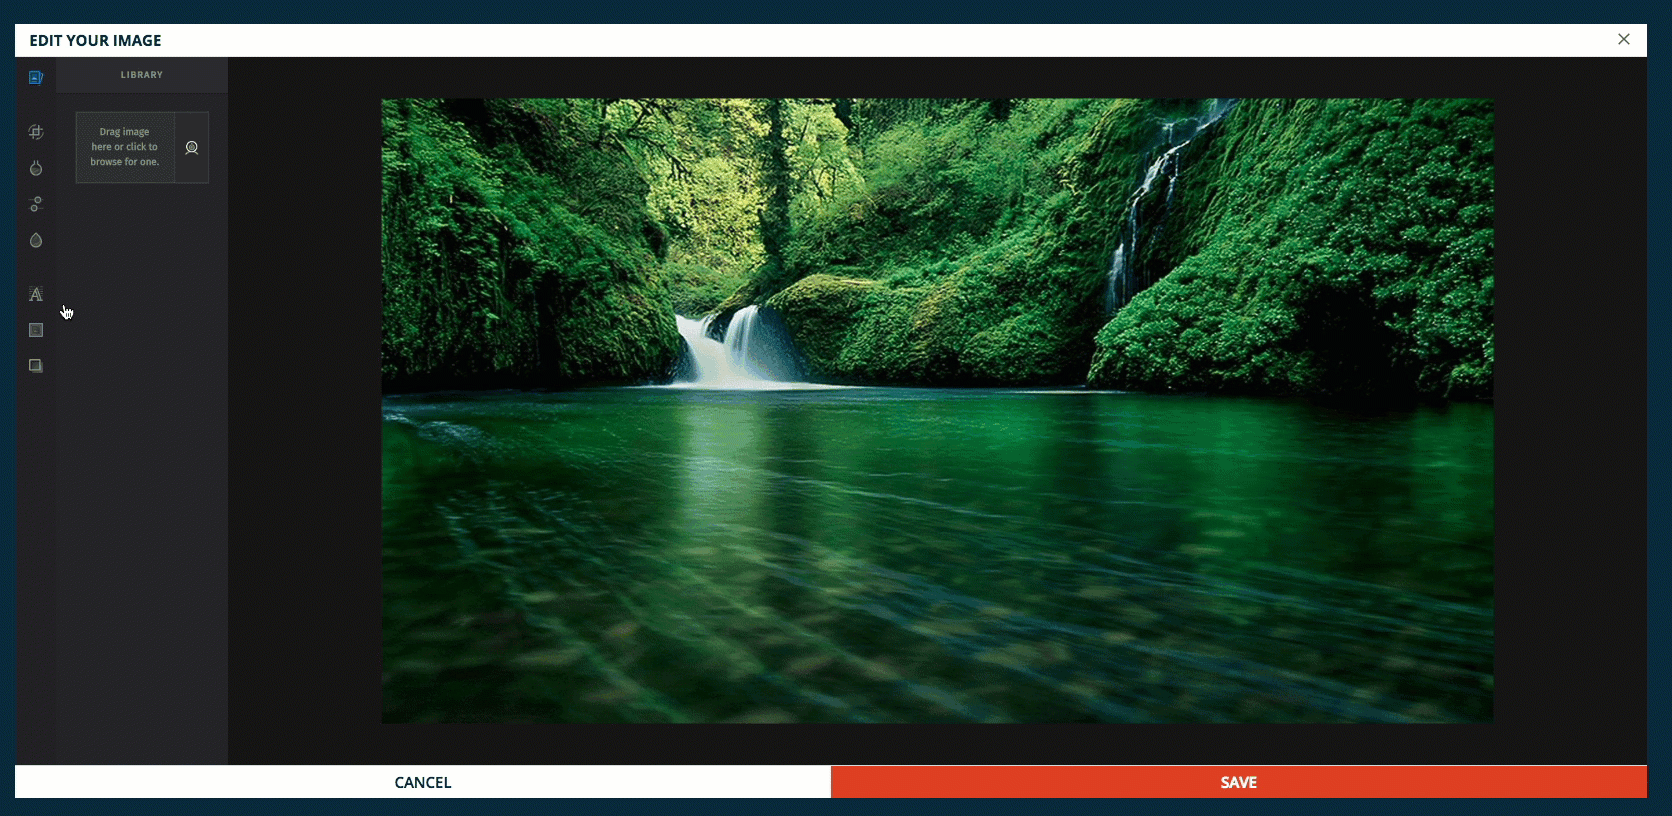
The Image Editor
Now that the Image editor is visible. Let's walk through the features. Hover over the icons to reveal the edit section names.
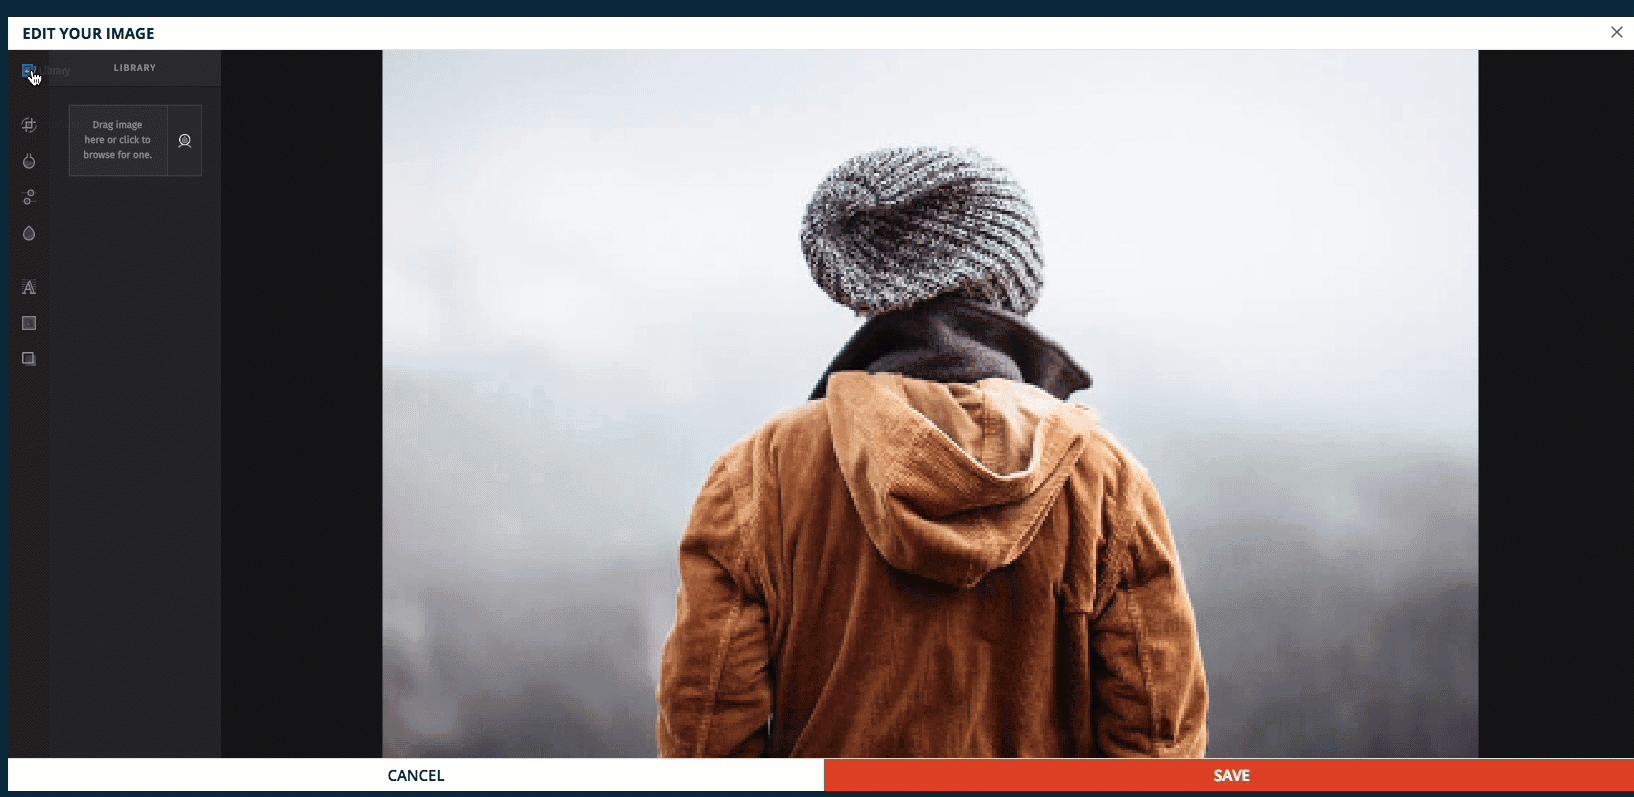
Library
This is where you can upload or drag and drop your own pictures.
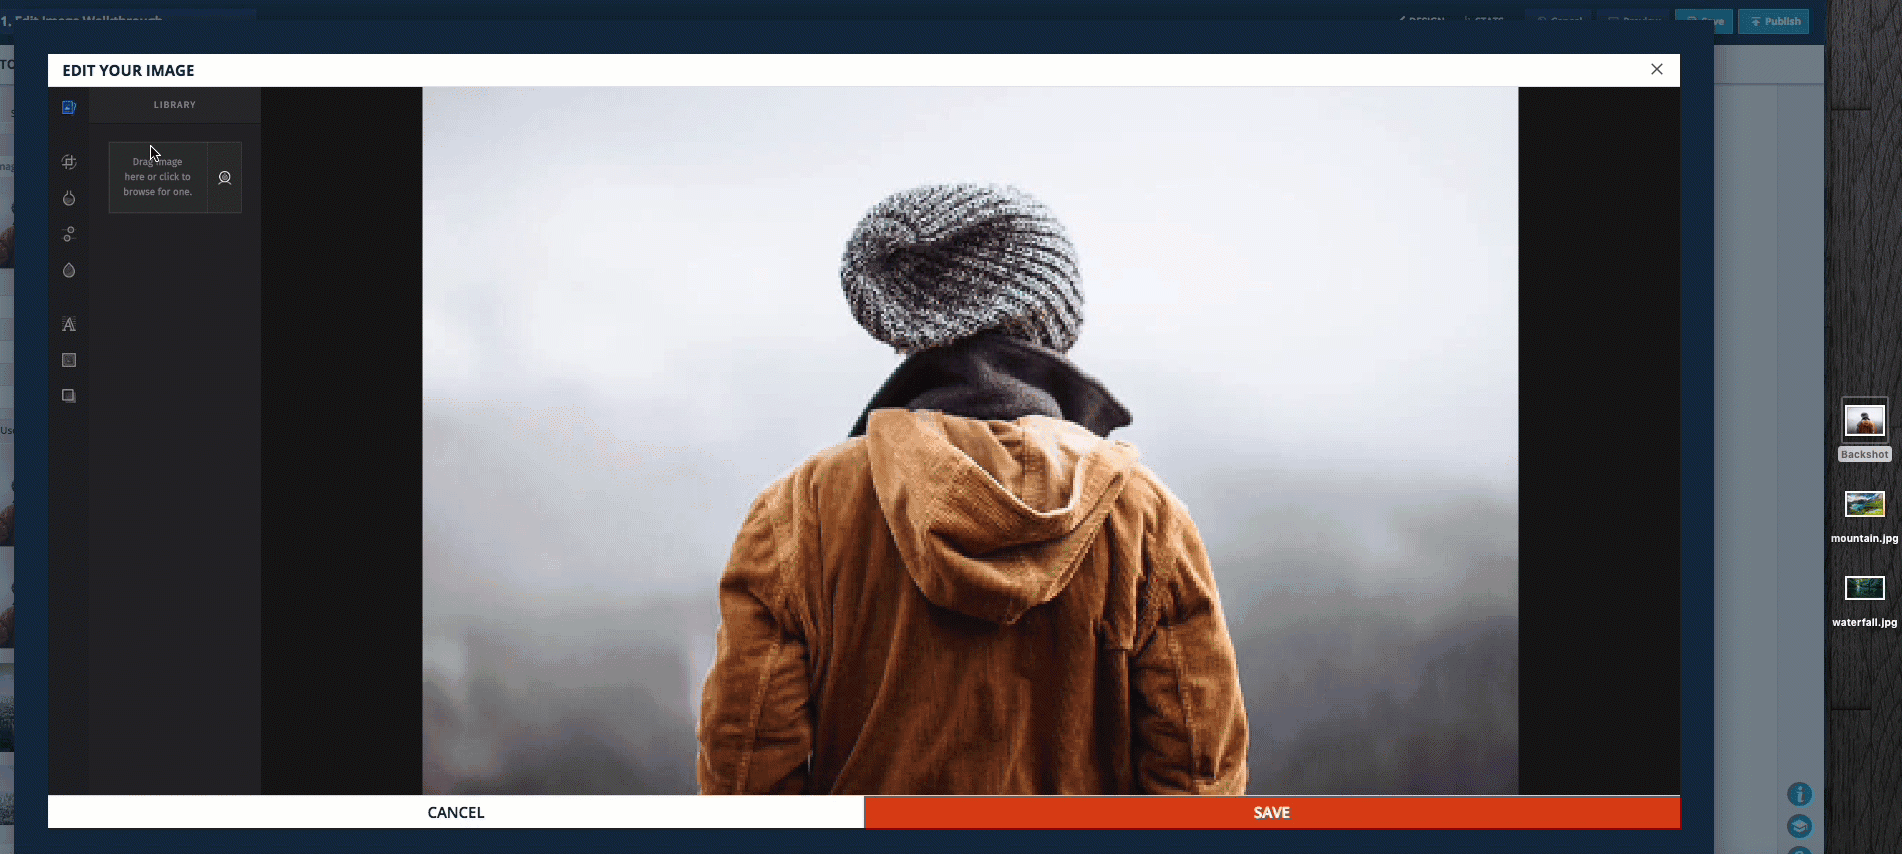
Transform
This is where you can crop, flip and rotate images. Use the "Common Crops" to speed up your workflow. Clicking on Transform also shows the original image size displayed at the bottom. This is handy for replacing template images with your own image of the same size.
Filters
Choose from up to 50 different mood settings! Use the slider to adjust the amount of effect.
Adjust
Use the sliders to adjust brightness, contrast and fine tune highlights, shadows, sharpness etc.
Focus
Add effects that blur backgrounds and focus in on parts of an image. Use the slider to adjust the amount.
Text
Add text to a photo. Also, change the font, color, background etc.
Frames
Use this feature to frame your photos, with the ability to adjust width and opacity.

Overlays
Add various layers on top of an image. Use the slider to adjust the level of effect.
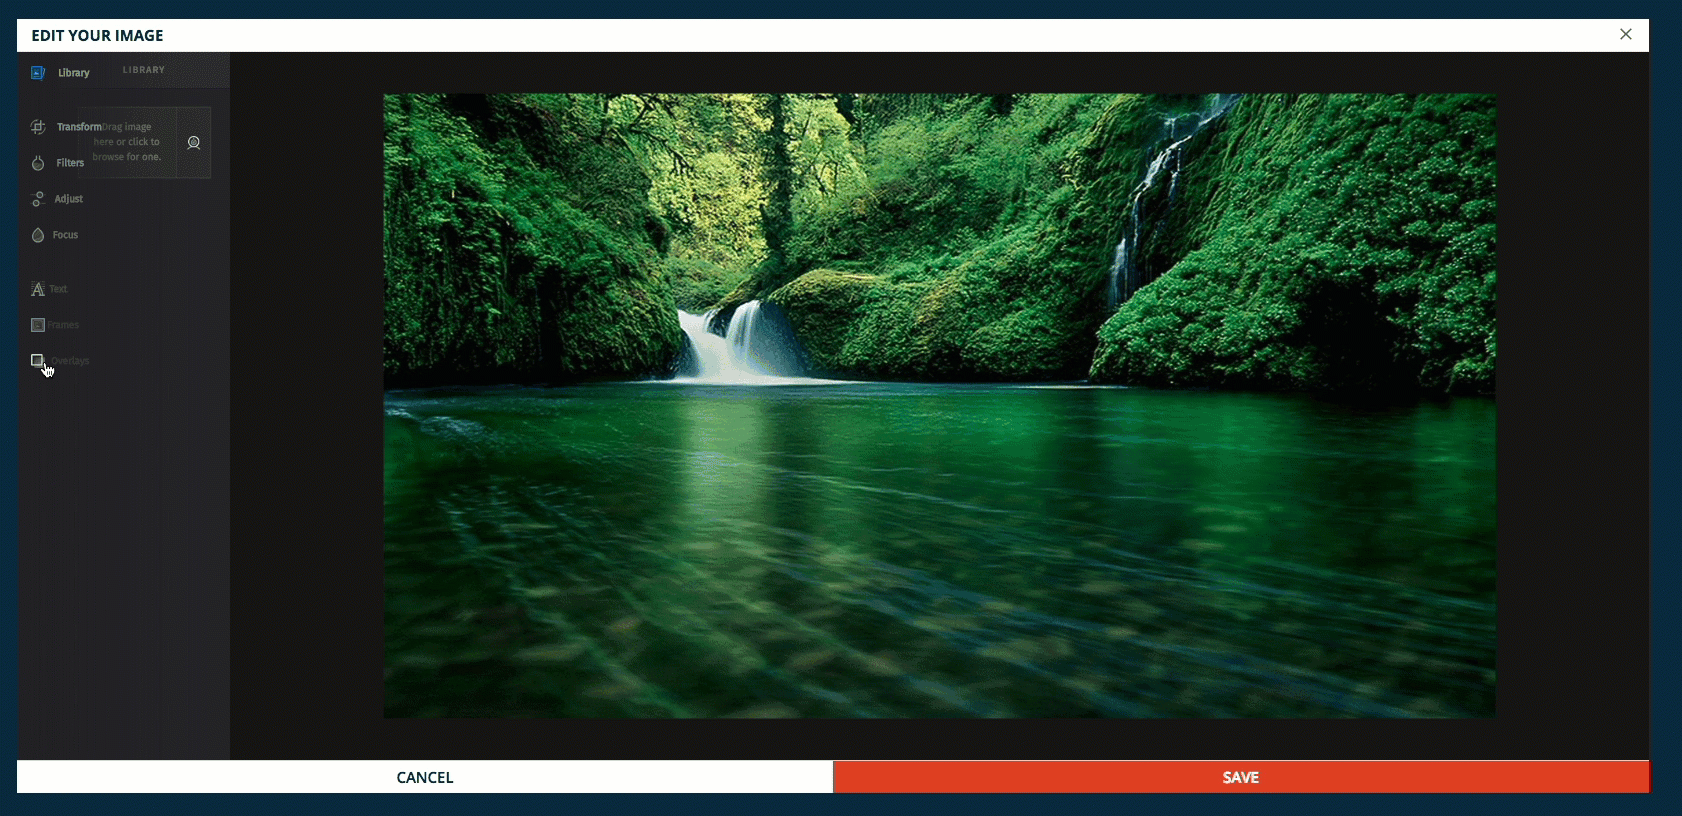
Save your Settings!
Remember that in order for your changes to hold, you must click the Save button.
Insert Hyperlinks
Text, buttons and images can be hyperlinked.
For text, select the text to hyperlink and click the link icon in the edit bar. To hyperlink a telephone number, select URL and type in Tel: and enter the phone number.
For buttons and images, click on the item and locate the link area on the palette panel.
You can link to a URL, ONTRAPORT Landing Page, Tracked Link, file hosted in the File Manager, or an ONTRAform lightbox form.

Videos "in" Emails
There isn’t a reliable way to have a video play inside an email in the majority of email clients and web browsers. You can make it appear as if there is a playable video. The way this is done is by inserting a linked screenshot image of the video into an email that, when clicked, directs people to a page where the video can be seen.
To make an email appear as if a video is in the email, use a static image and hyperlink that to URL where the video is hosted.

- Upload your video to ONTRAPORT or desired video host.
- Post the video to an ONTRApage and publish it. Document the URL of your ONTRApage. You'll need it in step 8.
- Take a screenshot of the video as it appears on the landing page. Tip: We like using Jing, a free screenshot software program.
- Save the screenshot to your computer with the play button visible.
- Go to Campaigns > Messages.
- Open the email Message you want to add the video into.
- Insert an image block and upload the screenshot image from your computer into the email.
- Link the image to your landing page. From step 2.

- Save the image block.
Edit Mobile Fonts and Backgrounds
The View Mobile Display feature allows you to view the ONTRAmail on a simulated mobile device, and adjust font style (the font family, italic, and bold settings), font sizes and background position specifically for those devices.
The View Mobile Display rendering is accurate for most of the mobile email clients, including iPhone, iPad and Android clients. As of November 2016, 55% of all email was opened on mobile devices, with 33% on iPhone, 13% on iPad and 9% on Android. The three mobile clients we know do not support the feature are Yahoo! Mail App on Android, Universal Outlook App on Windows Phone, and AOL Alto App on both Android and iOS.
Note: Gmail mobile clients such as "Gmail Email by Google on the App Store" for IOS and "Gmail App" for Andorid in the Play Store do not honor our mobile settings. The default mail application and most other apps on iOS will honor the mobile settings.
Mobile Display Settings Video
Edit Mobile Font Styles
Click the View Mobile Display button. The canvas will scale to 360px wide which is the average size of a small mobile device.

The font styles button will change to Mobile Font Style. Click on the Mobile Font Style drop down to edit the mobile fonts.
Edit the font face by selecting one of the options in the drop down, then adjust the font size, line height and weight (boldness) by using the sliders. You can also enter a desired pixel size manually for the font size and line height values. The choices presented are:
- Any of the listed font families
- Italic or normal
- Font size: 6px to 180px
- Line spacing: 6px to 180px
- Font weight range: This slider increments the CSS font-weight property from 100 to 900 (400 is "normal" and 700 is "bold")
Click the Save button to accept the change.
When you edit font sizes and style in View Mobile Display mode the changes are locked in for the mobile device. Changes to the font style and size will not propagate to the desktop view, and future changes to the font style and size in the desktop view will not change the mobile view.
Note: Only font style, size and Mobile Block Spacing for backgrounds are locked for the mobile display. All other elements, including font colors, background colors or images, text, adding or removing blocks, etc. remains synchronized between the mobile and desktop display.
Background Images in Mobile Block Spacing
Background images in email are cropped, but you can adjust how the background is displayed to a large degree by adjusting the Mobile Block Spacing. Select the block to edit, then use the Mobile Block Spacing drop down to increase or decrease the top and bottom space. The spacing will be locked for the View Mobile Display view, and not affect the desktop view.

Note: The text in blocks is still synchronized between the View Mobile Display and desktop versions of the block so remember to come back to the View Mobile Display view to see if changes to the text require tweaking the Mobile Block Spacing settings.
Page Width
The page width setting for mobile is fixed at "Full" and cannot be changed, regardless of the desktop view page width.
Reuse Blocks in other ONTRAmail Messages
Blocks can be renamed and reused in other ONTRAmail messages by selecting them from the Add Block page. This allows you to configure a block and reuse it in different ONTRAmail messages without having to configure it again.
- Rename a Block: Click on the block to edit it, then click the pencil icon next to the name of the block. Give the block a descriptive name. Remember to click on the check mark icon to save the new name!
- Re-use your configured blocks by clicking the + Add Block button and selecting it from the Copy From Existing Message dialog box.

Settings
- Click the Settings tab to configure your email from address, subject line, etc.

- Set your Send from (default) email address. This email address will appear as the "From" email address in the message. Selecting "Custom" allows you to enter your own text and custom reply-to email address.

- Set your Email from (default) email address. This is also the reply-to email address.
- Enter the Subject line of your message.
- The Add tracking to the links in this email checkbox adds UTM Marketing Tracking parameters to each link in the email.
- If the email is sent from a Campaign, Sequence or Rule, the name of the Campaign, Sequence or Rule is listed in plain text in the utm_campaign portion of the URL. Make certain your Campaign, Sequence and Rule names are suitable for disclosure to your customers before using this option.
- Statistics for each new link are found in the Tracking > URL History section in ONTRAPORT after the first click. The URL is added only after someone has clicked on the link to avoid populating that list with URLs that have never been clicked. The Tracking tab only shows first attribution items.
- All links in the email will have the same utm_campaign, utm_source, utm_medium, utm_content and utm_term added to each link. You cannot manually edit these links if the checkbox is checked.
- Leave this checkbox UNCHECKED if you are manually adding UTM parameters to your links in the email.
- This option does not interfere with the link tracking by email for triggering Campaign Triggers, Goals, Conditions or global Rules. For more information on how both types of link tracking in email work see our complete article on Automatic Email Tracking.
- Enter the Header Title. This information shows after the subject line in many email clients, and is used as the page title that appears on the browser tab when the email is viewed as a web page.

- Click the Copy from HTML button to create a text only version of the email. ONTRAPORT sends this version along with your HTML email to make sure your customer can see the email even if they have HTML turned off.

- The Spam Score information can be accessed by clicking the numeric spam score (if present). The spam score is provided by the open source application SpamAssassin.

- Transactional Email can be sent to contacts that have opted out of your regular marketing email and have a bulk email status of Transactional Only as well as all of your regular opted in contacts. It is used for non-marketing content only such as changes to your privacy policy, terms and conditions or to send paid content like newsletters to customers. Please read and understand all the requirements and limitations before use by reading our Transactional Email article. In the Messages Collection you will see "ONTRAmail (Transactional)" in the Type column when you make an ONTRAmail Transactional.

Share or Sell Your ONTRAmail Templates
You can share or sell your ONTRAmail template in the ONTRAPORT Marketplace by listing it publically or providing a link to it. See our ONTRAPORT Marketplace article for more details.
Articles in this section
- ONTRAmail
- Sending Emails
- ONTRAmail: Use Image for Video Links in Email
- Stop a Scheduled Email Broadcast
- Automatic Email Tracking
- Transactional Emails
- HTML Email
- Using IMAP Settings
- Scheduling Emails or Postcards for Birthdays and Holidays
- How to Properly Use Hyperlinks
Comments