
Campaign Builder Filters
About
Applies to: All ONTRAPORT accounts.
Filters change a contact's path and how they move through your Campaign map. Click the Filters tab or use the search box in the upper right to search for a specific filter element.
Filters include:
- Condition - Send a contact down two different paths based on criteria you set without rejoining at the main path
- End - Stop the contacts on the path they're traveling on and/or remove the contact from the Campaign
- Fork - Send a contact down two paths simultaneously without rejoining at the main path
- Go To - Route contacts to another element on a map
- Split - Send a contact down two percentage based paths that rejoin at the main path, at the same point
- Wait - Pause a contact for a designated period of time

Condition
Use a Condition to Separate the Contacts Prior to the Action, to segment the Contacts based on any condition prior to applying the Action element to them, you can also use a Condition.

Go To
A Go To can be used to move contacts throughout your Campaign. To connect a Go To to the desired element, simply grab the drag handle and connect. One great feature of the Go To, is the ability to add a new contact to a Campaign that has been running. For example, if you have a group of contacts that are already on the third email of a Campaign, you can use the Go To to drop new contacts to the same position of the others. A Go To cannot be connected to Triggers or Goals.

End
Adding an End stops the contact on that path. You can optionally have the End element also remove the Contact from the Campaign Map Path they are on (shown as an "Exit" End) by checking the check box to remove them. Note this action will NOT remove the contact from all paths on the Campaign Map, and only removes them from that individual path.

If you delete the End element to add more steps, the Contacts will be removed from the Campaign as well. If you know you will want to add new Campaign elements to the Campaign path later, use a Wait element set to "Forever" before the End to hold the Contacts. You can add new elements between the Wait and the End, and then edit the Wait to hold them for a specific period of time such as 30 minutes. The Contacts on the Wait will then flow to the next element.
Fork
In cases where you want to have two separate paths of actions, use a Fork. The Contacts all go down both legs of a Fork, so you can have them branch off to wait for an event using a Goal while continuing on in the main Campaign. A Fork is especially helpful if you use a Add to Sequence or Add to Campaign element (see the Add to Sequence and Add to Campaign Actions section).

Split
To Split Test an Action, use a Split element just before the Action. On each leg of the Split, insert the Action you want to test. You can configure the Split to send equal or unequal percentages down the legs of the Split (50/50, 60/40, 80/20, etc.), insert Wait elements in each leg (or just one), etc.

Wait
Wait: To pause a Contact before the Action use a Wait filter. Waits allows you to define how long to wait until the next action or process occurs on a Campaign path.
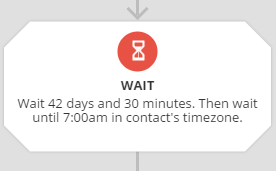
The Wait filter can be set to hold the contacts forever, until some time passes like the one pictured above, until a specific date arrives such as 1/1/2017, relative to a date field in the Contact Record (such as "3 days before the Birthday field"), or until a day of the week arrives ("Monday").
Wait until some time passes: Each day is a full 24 hours. If the Contact reaches the Wait element at 10:30 AM, and the Wait is configured to "Wait 1 day and then wait until 10 AM" the Wait will pause the Contact for a full 24 hours, until 10:30 AM the next day, and then wait until 10 AM is next seen (the following day).
Wait until a specific date: The Wait filter will advance Contacts only on the date specified. Contacts reaching the Wait filter before the date will simply pause until that date arrives. Contacts arriving at the Wait filter after the date has passed will be paused there forever, and never progress. To create a Campaign with specific dates for something like a newsletter, use a series of Triggers set to "Today is <date>" as explained in this Q & A article.
Articles in this section
- Campaign Builder Introduction
- Best Practices: Campaign Builder
- Campaign Builder Triggers and Goals
- Campaign Builder Actions
- Campaign Builder Filters
- Campaign Builder Webhooks
- Campaign Builder FAQs
- Campaign Builder Checklist and Notes
- Campaign Builder Modes
- Campaign Builder Revision History
Comments